Why Nut Welding Electrodes Stick — and How KCF Stops It

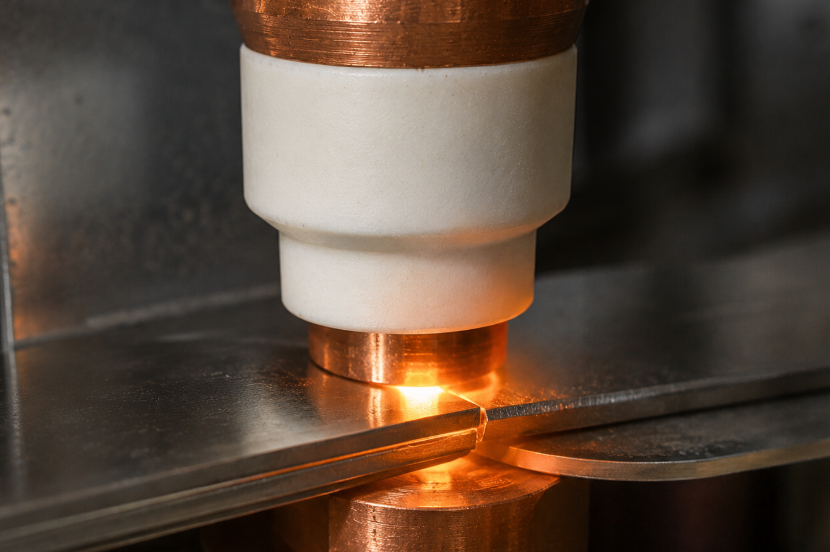
Sticking is the nut welding problem that announces itself loudest. A nut fused to the locating pin, a panel that will not come off the fixture, an operator prying at a workpiece while the line waits — every incident costs cycle time, and the worst ones cost the pin, the nut, and sometimes the part. We supply KCF guide pins precisely because of this problem, so we investigate sticking complaints constantly, and the encouraging news from all those investigations is this: sticking is almost never random. It has a small set of root causes, every one of them identifiable, and most of them fixable for the price of the right pin and a parameter review.
This article maps the four kinds of sticking customers actually report, traces them to their root causes, and explains — mechanically, not as a slogan — why an insulated KCF pin eliminates the largest category outright. Two real customer cases are included so you can see what the fix looks like in practice, along with a diagnostic sequence you can run on your own line this week without any special equipment.
The Four Kinds of Electrode Sticking in Nut Welding
“My electrodes stick” turns out to mean four different things when customers describe the symptom precisely. They are worth separating, because they have different causes and different fixes — and because the first question we ask any customer reporting sticking is “what exactly sticks to what?” The answer to that one question usually cuts the diagnostic work in half before anyone touches the line.
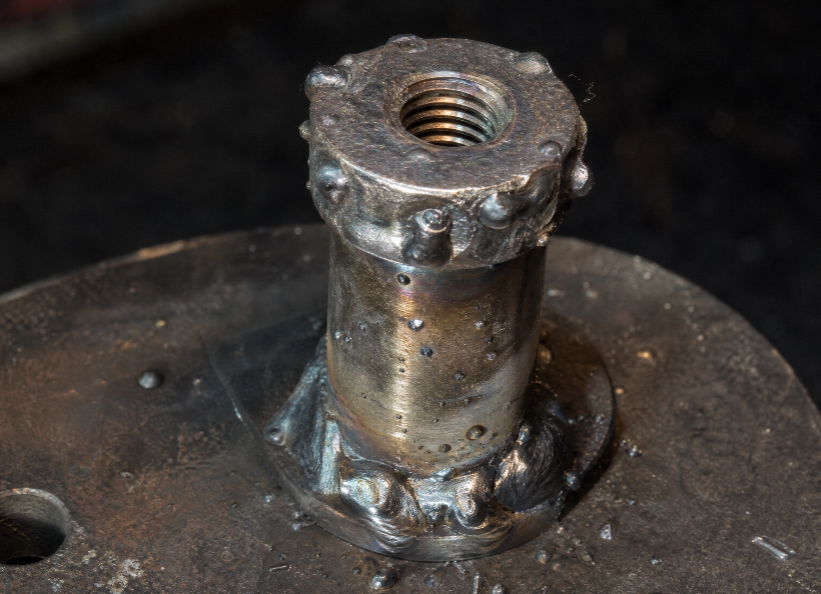
1. The nut welds to the locating pin. The most serious and most expensive version. Welding current finds a path through the pin itself, and instead of (or in addition to) the intended joint, a small unintended weld forms between the nut and the pin. The nut is now attached to the wrong thing, the pin is damaged, and the cycle is scrap.
2. The nut sticks to the lower electrode. The nut fuses lightly to the electrode face beneath it rather than sitting free after the weld cycle completes. Each incident means prying, face damage, and accumulating debris on the electrode surface.
3. The workpiece will not come off the pin. After a completed weld, the panel-plus-nut assembly jams on the locating pin — sometimes from a micro-weld between pin and nut, sometimes mechanically from spatter buildup or thermal deformation gripping the pin shaft as everything cools.
4. Zinc transfer makes everything stickier. On galvanized sheet, molten zinc wets and adheres to electrode and pin surfaces, building up layer by layer with every weld the line makes. The zinc deposits then grab nuts and panels that would otherwise release cleanly, turning an occasional annoyance into a chronic, shift-after-shift one.
These four interact — zinc buildup worsens mechanical jamming, expulsion worsens everything — but the first one has a single dominant root cause that deserves its own section, because fixing it eliminates the most damaging form of sticking entirely.
The Root Cause Behind Most Electrode Sticking: A Conductive Locating Pin
When we trace a “nut welded to the pin” complaint to its source, the single most common finding is disarmingly simple: the locating pin is an ordinary conductive metal pin. A plain steel or copper pin doing a locating job. Sometimes it is a worn standard part replaced in-house with whatever bar stock was handy; sometimes the line was built that way years ago and nobody questioned it; and a surprising number of shops have simply never heard that insulated locating pins exist.
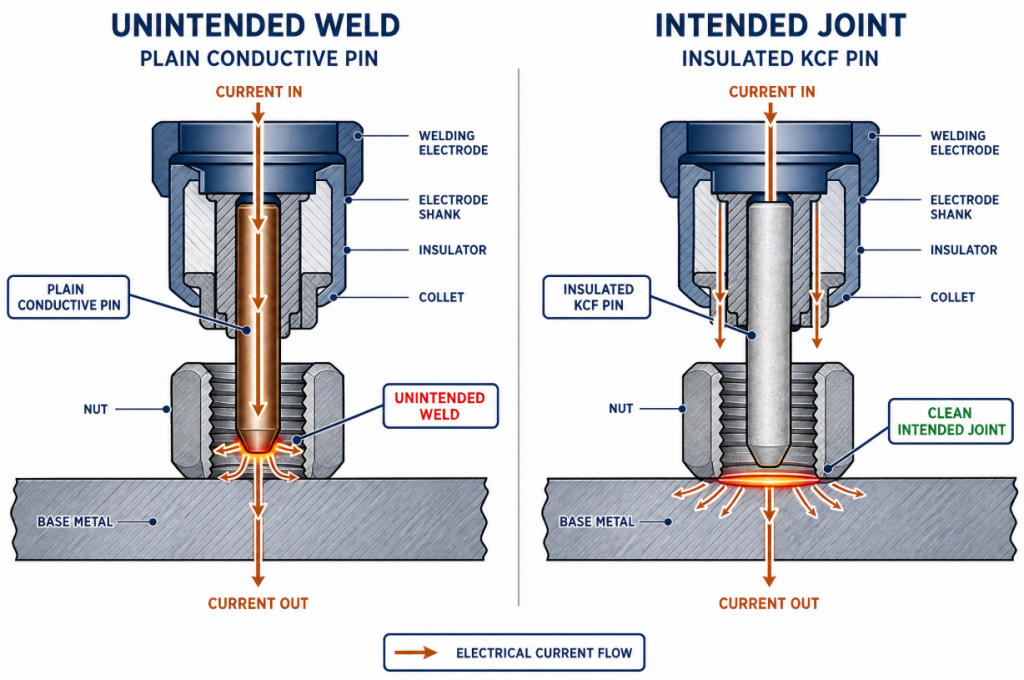
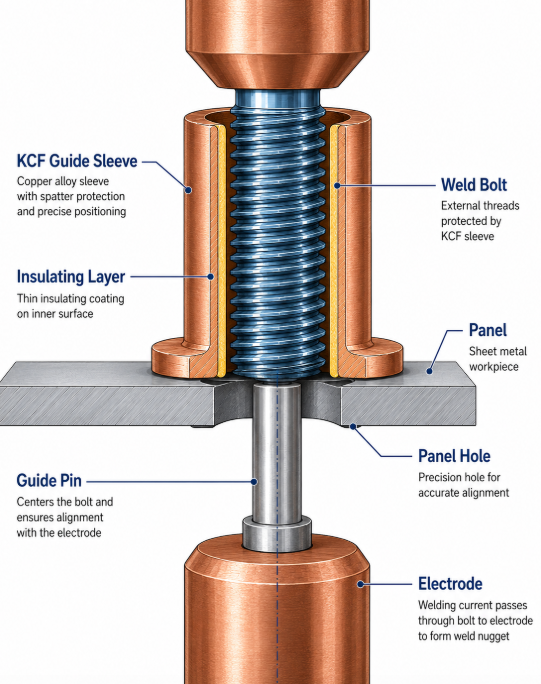
The mechanics are unforgiving. Welding current follows every available conductive path in proportion to its resistance. A bare metal pin sitting inside the nut’s hole, touching the nut and seated in the electrode, is a conductive path — a shunt in parallel with the intended weld. The shunting phenomenon is well documented in resistance welding research: current diverted through a parallel path reduces the current available at the intended joint, shrinking nugget size and weakening the weld, as shown in studies of shunting effects on spot weld quality. In nut welding with a conductive pin, the diverted current does double damage — it starves the real joint and it heats the pin-to-nut contact points, which is precisely how the nut ends up welded to the pin.
So a conductive locating pin produces both halves of the disaster at once: weaker intended welds and unintended pin welds. Every cycle is a dice roll on where the current decides to go.
Why does such a fundamental setup error survive on production lines for years? Because it fails intermittently rather than constantly. The shunt path’s resistance varies cycle to cycle — with contact pressure, surface condition, zinc films, the exact way the nut seats — so most welds come out passable and the pin-weld incidents arrive at random. Randomness is the perfect camouflage: each incident gets blamed on a bad nut, a dirty panel, or an operator, and the line carries on. Meanwhile the intended joints are quietly running below their designed nugget size on every cycle where the shunt takes its share, a defect no one sees until a strength test or a field failure asks the question. This is the strongest argument for treating even occasional pin-sticking as a structural symptom rather than bad luck: the visible incidents are the small fraction of a problem that is present, invisibly, on every weld the conductive pin touches.
How a KCF Pin Stops This Sticking at the Source
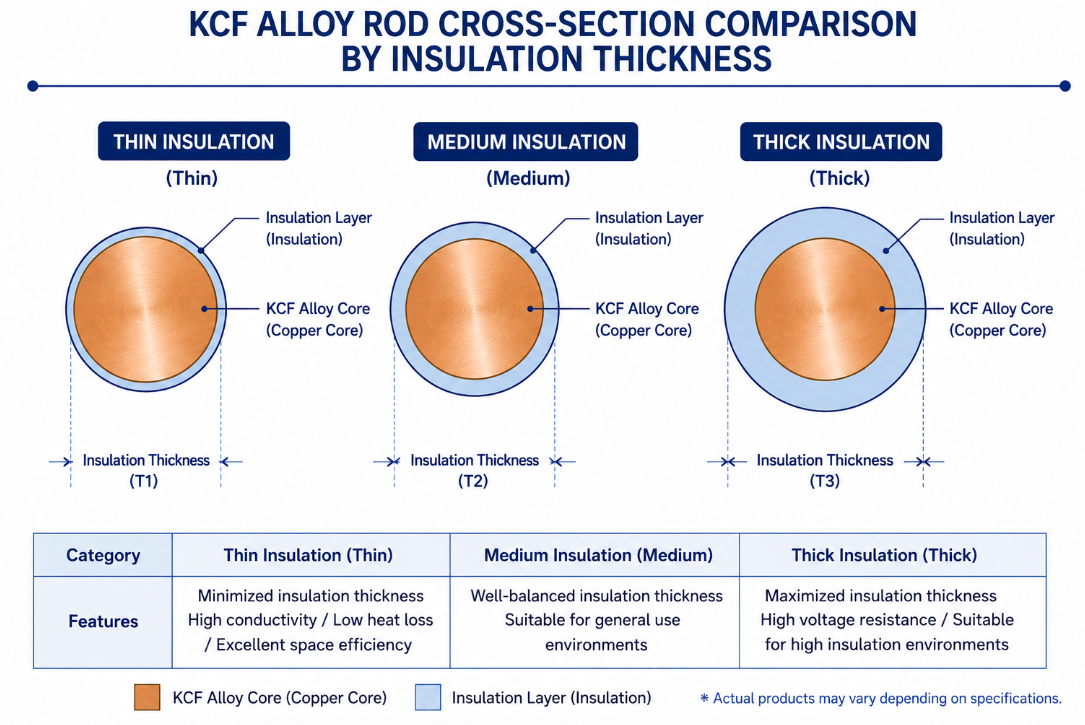
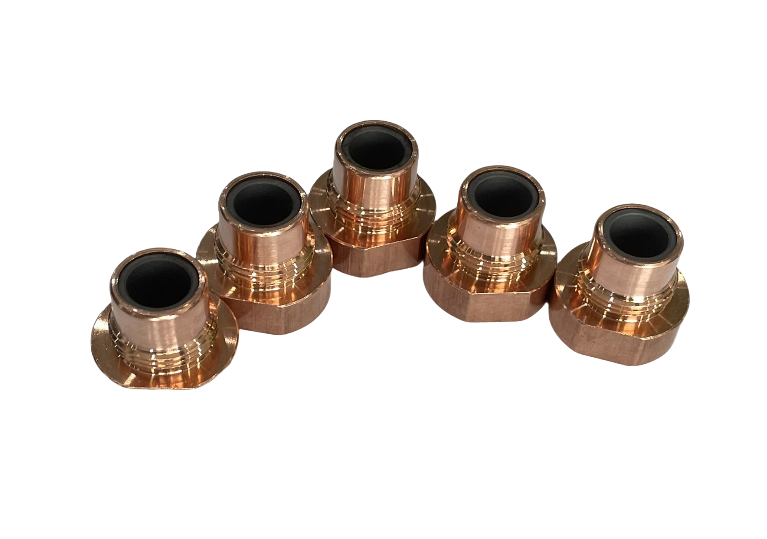
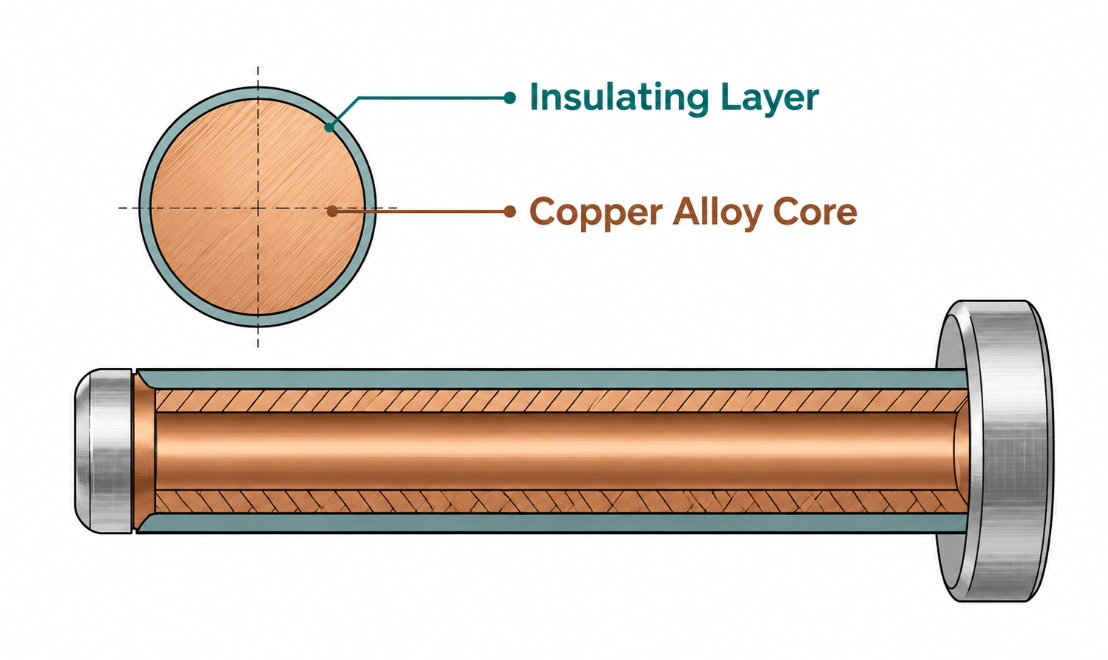
The KCF answer is not cleverness — it is subtraction. A KCF guide pin carries a hard insulating surface layer over its metal core, so the pin simply is not an available current path. Remove the shunt, and the current has nowhere to go but the intended joint. The nut cannot weld to the pin because no current crosses the pin-to-nut interface to make that weld. The intended nugget gets the full programmed current, so weld quality stabilizes at the same time the sticking stops.
This is why we describe KCF as eliminating — not reducing — this category of sticking. The other three categories below are managed and minimized; this one is removed, because its mechanism requires a conductive pin and the insulated pin takes that requirement away. For what the material is and how its insulating layer works, see our explainer on what KCF alloy is; for the pin as a component — installation, maintenance, service life — see KCF guide pins explained.
The table below puts the two pin types side by side on the behaviors that matter for sticking.
| Behavior During Welding | Plain Conductive Pin | KCF Insulated Pin |
|---|---|---|
| Acts as a parallel current path (shunt) | Yes — always available | No — insulating surface blocks it |
| Can weld itself to the nut | Yes, routinely | No, while insulation is intact |
| Effect on intended weld nugget | Starves it of current | Full programmed current reaches joint |
| Weld quality consistency | Varies cycle to cycle with shunt path | Stable — one current path only |
| Hidden failure mode | None — it always conducts | Worn-through insulation restores conduction |
That last row is the honest one, and it leads directly to the caveat below.
One critical caveat that our own investigations force us to state honestly: a KCF pin only insulates while its layer is intact. The second most common root cause we find behind pin-sticking complaints is a genuine KCF pin whose insulation layer has worn through — and which kept running because it still looked fine. A breached KCF pin is, electrically, a conductive pin again, and every sticking mechanism above comes back, often months after the original problem was “solved,” which is exactly when nobody suspects the pin. If sticking returns on a line that runs KCF, the first check is the pin’s insulation, not the parameters. Replace on a planned schedule rather than on appearance, because the failure that matters here is invisible to a visual inspection.
Electrode Sticking From Excessive Parameters and Expulsion
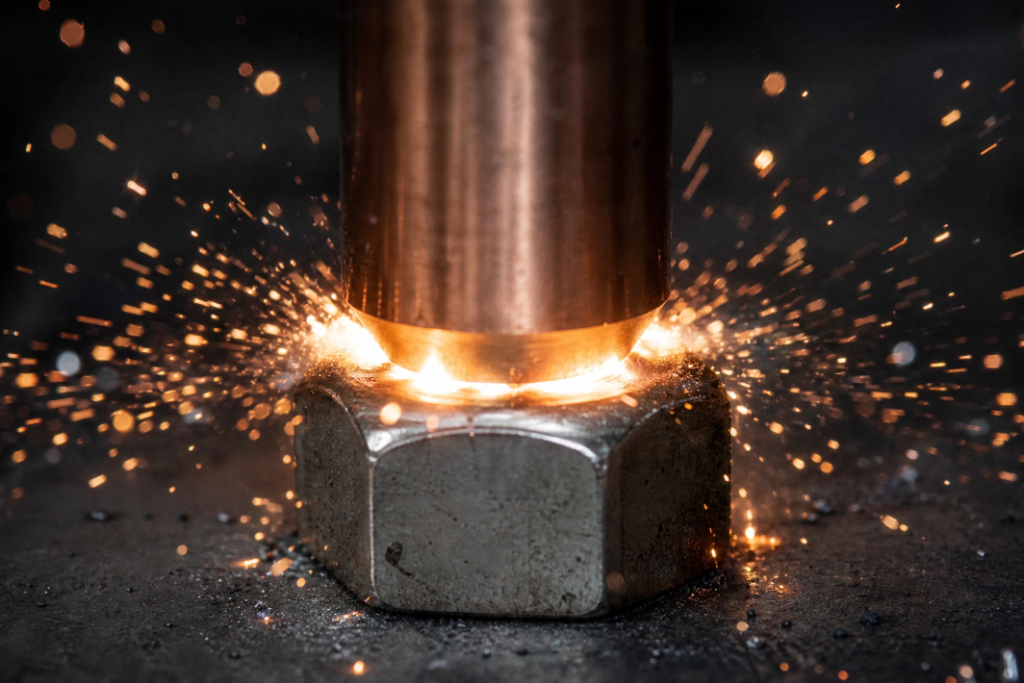
The second major root cause we confirm is process heat. Welding current set too high, weld time too long, or force too low all push energy into the joint beyond what the nugget can contain. The visible result is expulsion — molten metal ejected from the joint — and expulsion is sticking’s best friend. Research on galvanized steel confirms the chain directly: as welding current rises past the optimum, spatter generation increases sharply and zinc accumulates on the weld surface, degrading the joint and coating nearby surfaces.
Every expulsion event sprays molten metal onto the electrode face and the pin. Those droplets freeze where they land, building rough, grabby deposits. The deposits then mechanically grip the next nut and the next panel — sticking types 2 and 3 — and on coated sheet they are zinc-rich, which makes them adhesive as well as rough — type 4. A line running hot does not just make worse welds; it actively manufactures the surface conditions that cause sticking.
The fix is parameter discipline rather than any component: establish settings from a proper weld schedule, treat recurring expulsion as an alarm, and resist the habit of turning current up to push through other problems. We covered the parameter spiral in detail in our article on why electrodes wear out too fast, and everything there applies doubly to sticking, because the same excess heat that eats electrode faces also glues nuts to them.
A note specifically on zinc, since galvanized sheet dominates automotive and appliance nut welding. Zinc’s melting point sits far below welding temperature, so some zinc melts on every single weld no matter how good the parameters are — managing zinc is a maintenance rhythm, not a one-time fix. What parameters control is the rate of accumulation: a line running clean, expulsion-free welds deposits a thin film that scheduled cleaning handles easily, while a line running hot splatters zinc-rich droplets everywhere and overwhelms any maintenance schedule. The practical takeaway for coated sheet is two-sided: accept that pins and electrode faces need cleaning and replacement more often than on bare steel, and protect that schedule by keeping heat input honest so the schedule stays achievable. Shops that fight zinc with parameters alone, or maintenance alone, lose; the two together win.
Electrode Sticking From Wrong Pin Size and Clearance
The fourth root cause is geometric. The clearance between the nut’s hole and the pin’s diameter is a designed dimension, not an accident. Too tight, and the nut binds on the pin — thermal expansion during the weld closes the remaining gap, and the assembly jams even without any electrical weld between them (sticking type 3). Too loose, and the nut sits sloppy on the pin: location accuracy suffers, the nut can tilt, contact pressure distributes unevenly, and expulsion risk rises — feeding the deposit-driven sticking of types 2 and 4.
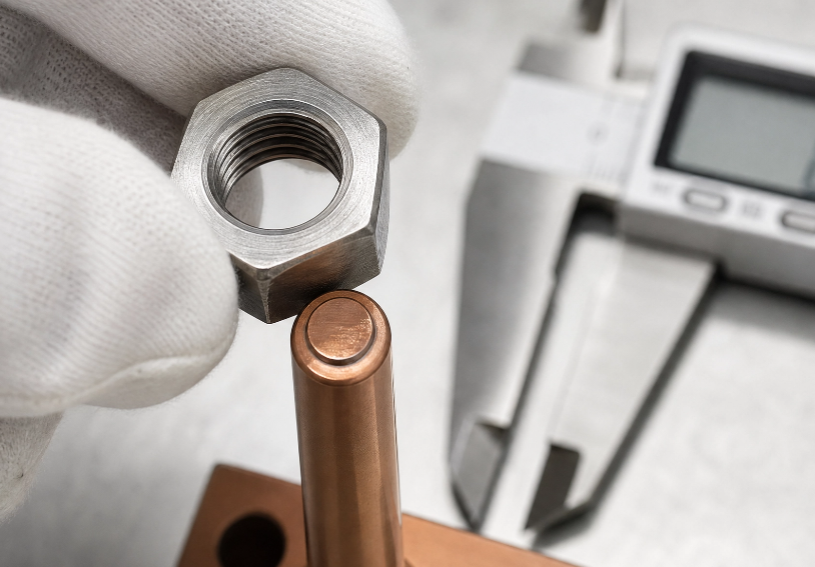
The symptom pattern is distinctive: sticking that correlates with a particular nut size, a recent pin replacement, or an in-house substitute pin “close enough” to the original dimension. Close enough is the problem. A locating pin is a precision interface between a specific nut and a specific fixture, and its diameter, taper, and length need to match the fastener actually being welded. This is also the honest reason we machine KCF pins to customer drawings rather than only selling stock diameters: the anti-sticking benefit of the insulation only delivers fully when the geometry fits the nut it locates.
If you suspect clearance, the verification is quick and concrete. Measure the actual hole diameter of the nuts you weld — from the current batch, since fastener suppliers and batches vary — and the actual diameter of the pin in service, worn as it is. Compare the resulting gap against what the original fixture design specified, and check the pin for taper wear that makes the clearance different at the tip than at the base. A pin worn into a subtle barrel or taper shape can measure correctly at one height and bind at another, which is why a pin that “measures fine” with a single caliper reading can still jam assemblies. Ten minutes with a micrometer settles a question that otherwise gets argued about for weeks.
Matching the Fix to the Sticking: A Diagnostic Table
| Sticking Symptom | Most Likely Root Cause | The Fix |
|---|---|---|
| Nut welded to the pin | Conductive pin, or KCF pin with breached insulation | Insulated KCF pin; planned pin replacement |
| Nut stuck to lower electrode | Expulsion deposits, zinc buildup, hot parameters | Parameter review; dress/clean electrode; manage zinc |
| Workpiece jammed on pin | Wrong pin clearance; spatter buildup on pin | Correct pin size to nut; reduce expulsion |
| Everything stickier on galvanized | Zinc transfer and accumulation | Accept faster maintenance cycle; keep parameters tight |
Two patterns worth internalizing from the table. First, the most damaging symptom — nut welded to pin — has the cleanest fix, because its cause is binary: the pin either conducts or it does not. Second, the remaining symptoms share parameters and zinc as aggravating factors, which is why a sticking problem rarely improves from a single change alone. The pin change removes a mechanism; the parameter review removes the fuel.
Two Real Cases of Stopping Electrode Sticking
Case 1: Right-sized KCF pin replaces a mismatched one. A customer running nut welding came to us with chronic jamming — workpieces sticking on the pin, occasional nuts fused to it. Their pin was an in-house replacement whose clearance did not match the nut hole. We machined KCF pins dimensioned to their actual nut and fixture. With the insulation removing the electrical sticking path and the corrected clearance removing the mechanical bind, the jamming stopped. The lesson: the pin’s geometry and its insulation are one solution, not two options.
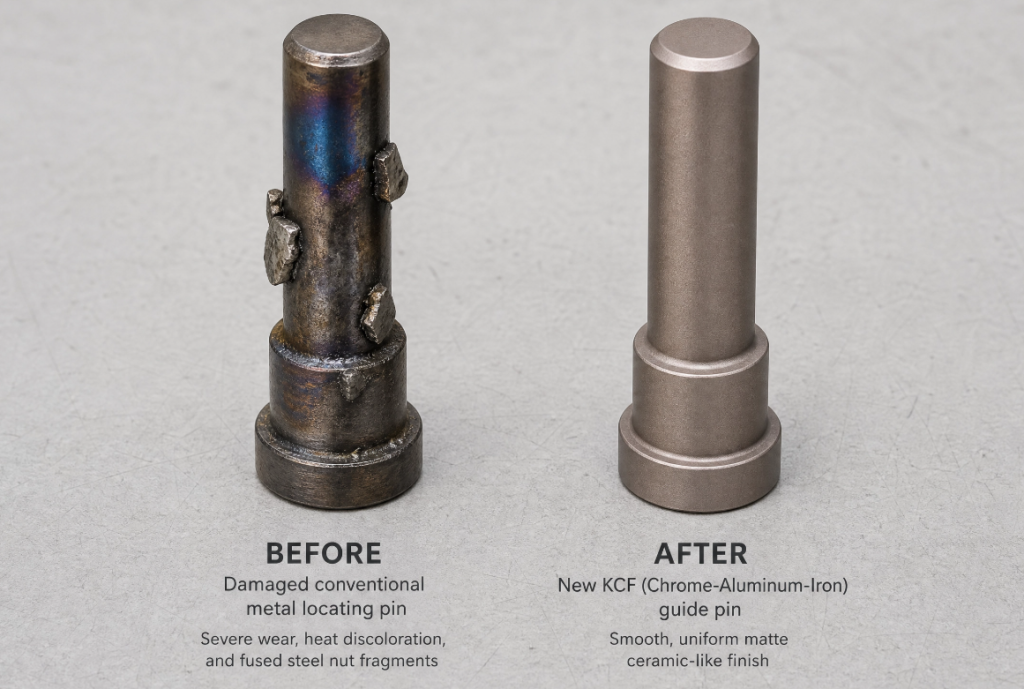
Case 2: KCF pin plus parameter review fixes sticking and expulsion together. Another customer had both heavy spatter and recurring sticking. Swapping to KCF pins removed the pin-weld incidents immediately, but the electrode-face sticking persisted until a parameter review brought their current down from a setting that had crept up over months. With the heat input corrected, expulsion dropped, deposits stopped accumulating, and the remaining sticking faded. The lesson: when sticking has two causes, fixing one reveals the other — finish the job.
What both cases share: nothing exotic was required. A correctly specified insulated pin and honest parameters solved problems that had been treated as facts of life on those lines for months.
There is a cost dimension to both stories worth making explicit. Before the fix, each line was paying for sticking continuously — pry time on every incident, damaged pins and nuts, scrap cycles, and in the first case an unknown number of under-strength welds shipped before anyone connected the symptoms. Against that running cost, the fix was a set of correctly dimensioned pins and, in the second case, an afternoon of parameter work. Sticking problems have this in common with most chronic production problems: the cure is almost always cheaper than a month of the disease, and the only expensive part is the time spent treating the disease as normal.
A Practical Sequence for Diagnosing Electrode Sticking
When sticking appears, run this order:
- Identify which of the four sticking types you actually have. Look at where things stick: pin, electrode face, or workpiece-on-pin. Precision here saves every later step.
- Inspect the pin. Is it conductive metal? If it is KCF, is the insulation intact — and how would you know? If there is any doubt, replace it; a pin is cheap against the scrap it prevents.
- Look for expulsion. Spatter on faces and fixtures means heat input is feeding the problem. Review current, time, and force against a real weld schedule.
- Check pin-to-nut clearance against the nut actually being welded — especially after any pin replacement or nut change.
- On galvanized sheet, shorten the cleaning and dressing cycle. Zinc accumulation is managed, not eliminated; schedule for the material you actually run.
A line that clears all five checks and still sticks is rare enough that we would genuinely like to hear about it — that is not rhetoric; unusual cases are how we learn.
One sequencing tip from running this diagnostic with customers many times: resist the urge to change several things at once. When sticking is painful, the temptation is to swap the pin, drop the current, and shorten the cleaning cycle in the same week — and if the problem improves, you will never know which change did the work or whether one of them was unnecessary cost. Change the most likely cause first (for pin-weld symptoms, that is the pin), run long enough to see the effect in your incident rate, then move to the next item if anything remains. The disciplined version takes a little longer but ends with knowledge: you know exactly what was wrong, which means you know exactly what to watch so it never comes back.
Final Thoughts on Ending Electrode Sticking for Good
Sticking feels random from the operator’s side — some shifts are fine, some are a fight — but underneath, it is mechanics: a conductive path that should not exist, heat beyond what the joint needs, a clearance that does not match the nut, zinc doing what zinc does. Each cause is identifiable, each one leaves its own fingerprint on the failed parts, and the biggest one is entirely removable with an insulated KCF guide pin that fits your fastener.
If sticking is costing you cycles right now, the fastest path is to tell us three things: which of the four sticking types you see, what pin you are running today, and the nut size and sheet material on the line. From those details we can usually identify the root cause in one exchange and recommend a pin — standard or machined to your drawing — that takes the electrical path out of the equation entirely. Browse our KCF guide pins range, or simply send the details and let the diagnosis come to you.
Share This Article
Latest Articles
October 20, 2026
October 20, 2026
October 20, 2026
October 20, 2026
October 20, 2026

October 20, 2026
October 20, 2026
October 20, 2026